Sunday, December 12, 2010

Getting Started on Your Landscape

1. Open a new Photoshop file. The size should be 8 x 10 inches and the resolution should be 300. This means there are 300 pixels per inch making it a very clear, high quality image. It is important that you are working with other large images to avoid pixelation.

2. Rotate canvas so it is landscape, or horizontal.

3. You may want to create a new layer and fill it with a sky color to start. This way you will not have to work with all white space. This layer can always be deleted later if you find images to use for the sky.

4. This is a collage project: at least 15 different found images must be used. Also, do not use the pen or brush tool; drawing is unnecessary for this project.

5. For every image you are working with, you must open it in Photoshop to work from. Make a selection with the lasso tool to cut out a part of an image you wish to use. Copy the selection and then paste it in landscape file that is you project. You do not have to save any of the images you open in Photoshop. Below is how I got started on my project:

I wanted to take the grass from this photo to use in my project so I used the lasso tool to select it. Then I copied it and pasted in blank/project file.

I realized it was too small so I pasted anonother image of the grass and combined them together.


I used the blur tool to make to blend the two images together so you could not really tell where one image ended and the other started.


Friday, December 10, 2010

The New American Landscape

  • Create a landscape that contains a combination of man-made structures and natural elements.
  • It should be based on things that do exist in your neighborhood and things that do not exist but you wish did
  • You may also include things/scenes that you see from your route from home to school or other things that are in Chicago
  • This is a digital collage: use pieces from the images you find on-line.

Thursday, December 9, 2010

The New American Landscape

For this project you are to create a digital collage depicting an invented landscape/environment. Think about your own neighborhood or areas of Chicago you frequent as a place to start. Consider the scenery and surroundings of your neighborhood and Chicago, the positive aspects, man-made structures, natural elements as well as the things that are negative, unnecessary or do not improve the quality of life for a community. Create a  juxtaposition by combining images that do not seem to belong together to develop a visual paradox.

Step 1: Brainstorm! What type of images do you want to look for? Make a list if needed.

Step 2: Image Search. Using Google image search or other search engines or photo sites to collect 20 high quality images. When using Google image search, only use medium and large images to make sure they do not become pixelated in your project. Also, do not just use the images that come up first, look through several pages to find a variety of images.


Thursday, November 4, 2010

Changing Images Book: Rubric

Images are sequenced in an order that clearly shows a change, growth, progression or a regression (first image is drastically different from last)  20

The background shows a clear relationship with the image in the foreground. (color relationship, environment or setting, etc) 15

Complexity and originality (did you push yourself? images are strong, drawing is proficient) 25

You utilized a variety of PS tools and techniques (lasso, copy, paste, move, transform, fill, paint brush) to create complex images 25

You included details that enhance the image (color, different values of the same colors, shading to show depth, texture, etc) 25

Total                                                                                                                                                      100 points

Monday, November 1, 2010

Creating the Pages in the Book

1. Open a new document in Photoshop. File-New-type in the height and width in inches instead of pixels. Choose the size of the document that makes sense with your book (square or rectangle). This size will be the size of the images in the book and should not exceed 5.5 x 8.5 inches.

2. Go back to your other PS document with your image in it and use the lasso tool to draw and trace the part of the image you would like to work with first.

3. Copy your selection. Then click on your new blank PS document and paste the selection. The image will be very large in this new document so you will need to resize it. Control-T (transform) and descease the size of the image by dragging a corner in while holding down shift to keep the image proprtionate.

4. When you have made changes to the first image and are ready to save, go to File- Save As and name the document Book_p1 to keep everything organized. Continue to use Save As as you work to create the different pages in your book and keep them numbered.

Changing Images Book: Getting Started

To Make Your Image Whiter & Brighter
1. Open your drawn images in Photoshop.
2. To make the photo brighter and less yellow: Layer- New Adjustment Layer- Brightness and Constrast and adjust the brightness and contrast to desired result.
3. To get rid of the yellowness in the photo: Layer-New Layer- Photo Filter- Click on Color and change the color to black
4. Merge all these layers together by highlighting all the layers in the layers window and right click and go to Merge Layers. This will make all of the changes to the image in the same layer.

Monday, October 18, 2010

Changing Images Artist Book

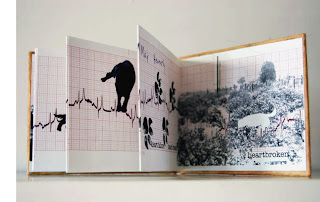
In this project you will create an accordion style book with a series of images created using Photoshop. To start, you will hand draw an image that will be photographed and opened in Photoshop to work with. You will create your own, unique design for the book and then construct it by hand using colored paper.
The series of images should show a growth, change, a progression, a regression, or a transition. The first image of the book will be your hand drawing. Then you will use Photoshop to make changes to the original image, creating a series that ends with a final image that is completely different than what you started with.
Below is an example of paintings by Piet Mondrian that show a change; the trees go from partially realistic to more abstract. This is just one example of a series that shows change.
              
List as many ideas or examples that relate to each definition. This is a way to begin thinking of images you could use in your book.
Growth – development of a lower or simpler to a higher or more complex form; evolution


Progression- movement, as toward a goal, steady improvement


Regression- a return to a previous, usually worse or less developed state


Change- to cause to be different, to give a completely different form or appearance to


Transition- passage from one form, style or state to another

Tuesday, October 12, 2010

Artist Statment Requirements for Dream Project

Complete a typed artist statement for your Dream Project that helps the viewer better understand your piece. A printed copy is due in class the day the project is due.

Please include the following information in your 1-2 paragraph artist statment:
  • Basic overview of your dream 
  • Describe why you created the imagery in your piece
  • Describe how the composition, color choice, and layering relates to the content of your dream and overall visual concept of the piece

Monday, October 4, 2010

Adding Color

To Create a new shape with color:

1. Create a new layer. (Layer- New Layer)

2. Use the Lasso Tool (Polygonal or Regular) to create the shape.

3. Enclose the shape so it is selected (moving dotted lines).

4. Choose and fill color. (Edit- Fill- use drop menu and select Color and choose color from palette, press OK)

5. De-select selection (Control-D)

6. Move Layer to the bottom of layer window if you want the text to be on top of the color.

Adding Your Drawings to the Text

1. Open your drawing with photoshop.

2. Make the drawing more white and less grey.  Image- Adjustments- Exposure and increase exposure until background is white.

3. Zoom in on image using Magnifying Glass. This will make it easier to use Lasso Tool and make selections.

4. Select image you want to copy using Lasso Tool (regular Lasso= free form, Polygonal Lasso- point by point, more accuracy)

5. Using Polyonal Lasso Tool trace around the image using a series of connected points and enclose the shape so selection is made (moving dotted lines).

6. Copy image (Edit- Copy), then click on your Text document and Paste (Edit- Paste)

7. Enlarge image by transforming. Hit Control-T and enlarge image by dragging the corner. Remember to hold the shift key while enlarging to keep image proportionate and let go of the mouse before shift when you have the size you want.

8. Apply the Transformation by clicking on the Move Tool and it will ask you if you'd like to apply the transformation. Click yes if you would like to or canel to return to the size you started with.

Sunday, October 3, 2010

Dream Project Rubric

Emphasized important words and phrases about your dream and thoughtfully arranged them in the composition 15

Applyed a limited palette of colors  to enhance without overwhelming the meaning & content of the piece 15

Selectively used color to create contrast and areas of emphasis 15

Utilized the opacity tool to explore different values and layers of text/image to convey the idea of memory and the unusual nature of dreams 20

Combined text and image to make a complex composition and a personal, narrative work of art 20

Used in class time effectively 15

Total = 100 points

Dream Project Example

Tuesday, September 28, 2010

Dream Text Requirements


Create visual differences in text by changing font (limit 2), size, color (limit 2), spacing, height and width (in character box).

Rasterize text so that it becomes an image and is transformed (distort, skew, perspective, etc, limit 3) to convey movement and rhythm in the composition.

Convey a sense of depth by overlapping text and changing the opacity.

Highlight and emphasize important words and phrases by enlarging, distorting, making bold or changing the color. Make sure these words are legible because they are most important.

Treat the text as image and devlop a dynamic composition in which you consider the negative space as well as the positive space.

Thursday, September 16, 2010

History of Surrealism

Please read the following essay on the history of Surrealism from the Metropolitan Museum of Art website and answer the following questions:

http://www.metmuseum.org/toah/hd/surr/hd_surr.htm

1. When and where did Surrealism take place?

2. What is automatism?

3. Who were the Surrealists influenced by?

4. In what ways did the the Surrealists develop their imagery?

5. Name some leading figures in the Surrealist movement.

Surrealist Artwork

1. Max Earnst
Describe what you see.
Explain how Ernst has created contrast and emphasis in this painting.


2. Max Ernst
How does the artist untilize value in this drawing?


3. Hannah Hoch

What is in the foreground? What do you see in the background?
Where is the viewer positioned in this collage? Describe how Hoch has depicted space.


4. Salvador Dali
Geological Destination, 1933

What is the focal point in this painting? 
Describe the space being depicted.


5. Rene Magritte
The Lovers, 1928
Oil on canvas
What is the subject(s)? What do you think is the content of the painting? 


6. Kay Sage
Danger, Construction Ahead, 1940
Oil on Canvas

Describe the color in this painting. 
How does the color affect the mood of the painting? 


7. Dorothea Tanning
Children's Games, 1942

Describe how Tanning created movement in this painting. 
After taking a careful look at the painting, come up with a short (2-3 sentence) narrative or story. 


Monday, September 13, 2010

Fumage Rubric

Draw images you see using the pen tool and integrate them into the composition effectively 10


Manipulate and transform selections (using magic wand) to create emphasis and contrast  15

Develop a limited color scheme with a range of values 10


Composition shows evidence of risk taking and experimenting with layer effects 15

Thursday, September 9, 2010

Fumage Sample

Fumage Project Directions

Graphic Arts I JCP Visual Arts, Boban

Unit: Surrealism, Lesson: Fumage Photoshop Activity

To Get Started:
1. Choose one of the Fumage images and save it to the desktop.
2. Go to start- and open Photoshop
3. File - open - click on Fumage image and a new photoshop document will open with this image as the    background layer.
4. With the magic wond tool, click on an area to be selected
5. Then copy (ctrl-c) and paste (ctrl-v) a new layer will automatically appear with the selected area in it
6. Click on the eyeball off on the background layer and you will be able to see just the new layer with the selected area
7. Make sure that Layer 2 is highlighted in the layers window so you can begin to make some changes to the selection.
8. Make changes to to scale and proportions with Transform (ctrl-T). A box will apprear around the area and you can stretch, enlarge, shrink, turn, etc. If you would like to keep the proportions and enlarge at the same time, hold down shift as you are enlarging .
9. Repeat this process 3 more times selecting different areas with the magic wond tool and creating new layers.You should have 4 layers all together.
10. You may change the order of the layers by dragging one layer above or below another in the Layers Window.
11. Practice switching layers on and off by clicking on the eye. This will help you to see only the specific area you are working within that layer.
12. Change the opacity of a layer. The lower the percentage, the more transparent or see-through the layer will be. This can make some interesting visual effects similar to watercolor washes.
Objectives/Requirements: use as a checklist during project
• Identify the tools in the tool box

• Switch layers on and off to observe changes

• Use magic wand to select areas randomly

• Double click on layers to open the alterations menu to manipulate the layers with different effects.

• Merge related layers together.

• Use the pen tool to outline the images you see

• Change colors using fill tool and color box on the tool bar

• Copy and paste a selection

• Transform a selection

• Use short cuts to: transform, copy, paste, and create a new document.

Wednesday, September 8, 2010

Fumage Images


Select one of the fumage images to use for your first Photoshop project.