Your art making techniques and use of media/Photoshop tools is proficient ___ /20
Your imagery/subject is original, complex, and clearly shows a connection to the over all theme and concepts of the project ___ / 20
Your use and application of the elements and principles is strong and deliberate ___ / 20
You created a dyanmic composition(s) by considering the positive and negative space, breaking the picture plane, point of view, and placement of images. ___ / 20
Total Points ___ / 80
Wednesday, May 25, 2011
Graphic Design Final Project
For the last Graphic Design project, you will apply some of the concepts and techniques you’ve learned and practiced throughout the year. Take a minute to read this brief list of things we’ve done this year:
· Photoshop techniques – filters, image adjustments, magic wand, clone stamp, color, brightness and contrast, transform, etc
· Working with text, text-as-image
· Combining text and image
· Changing and manipulating hand-drawn images in Photoshop
· Staged photography, high contrast lighting
· Digital collage, cutting parts of images to create a new images
· Appropriating images
· Different angles and compositions when taking pictures
· Enhancing and manipulating photographs in Photoshop
THE PROJECT CHOICES
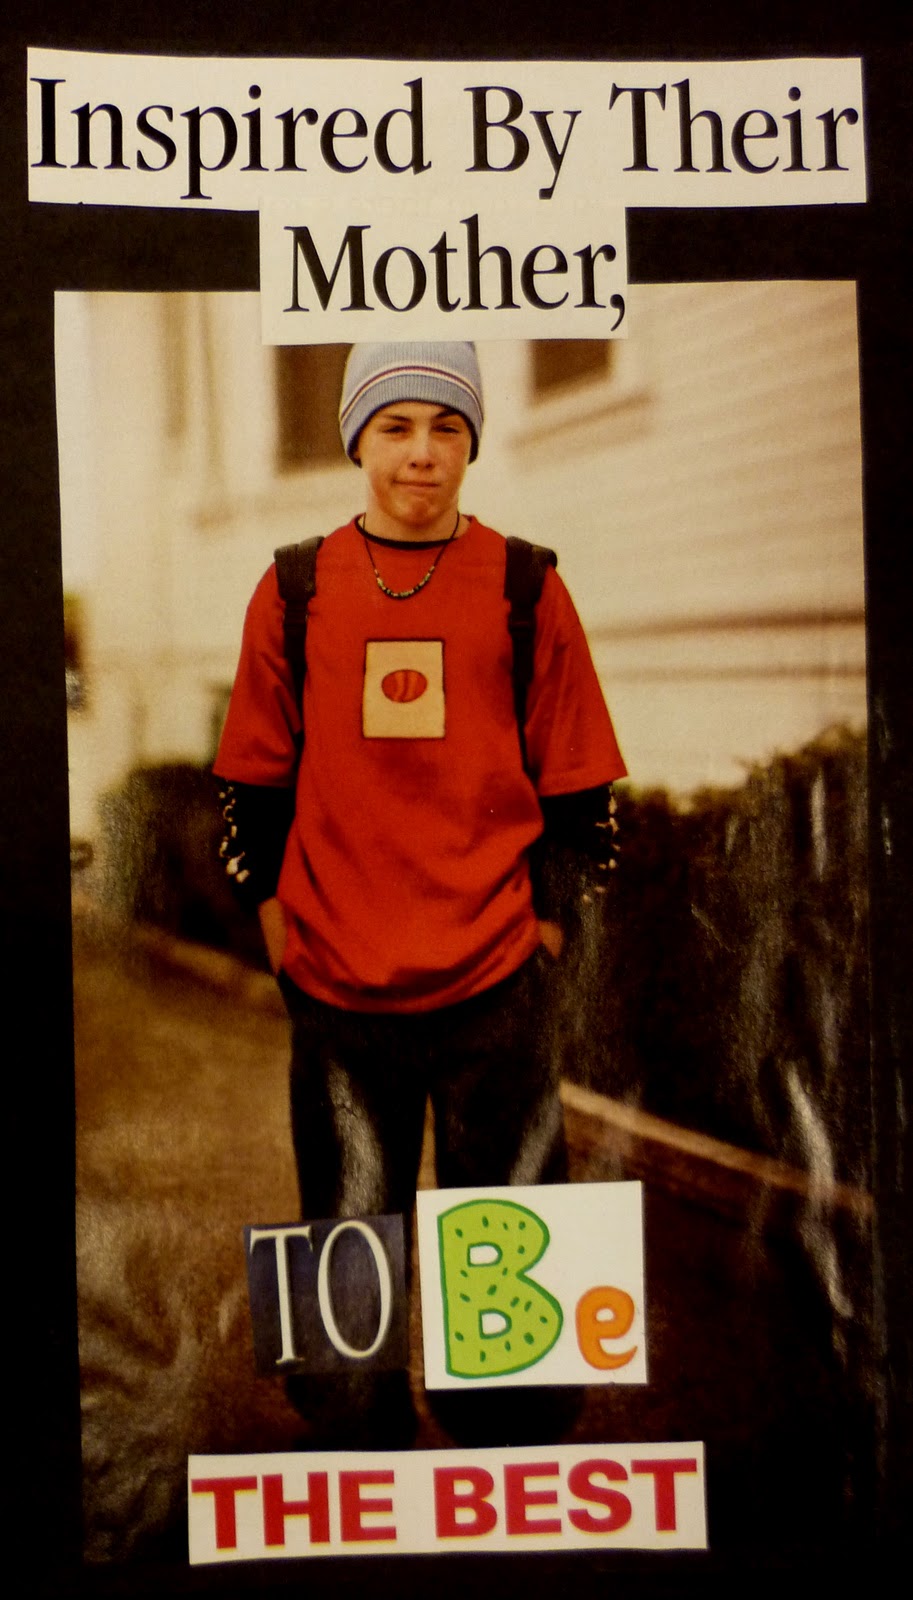
· Design a digital work of art illustrating an important milestone or event in your life not including a typical event such as a birthday, first day of high school or getting your driver’s license. Try to think of something important that is not normally recognized and then visually convey this in a work of art.
· Create a series of 6-8 photographs that tell a story. The goal is to convey a narrative entirely with pictures. You can stage the photographs and ask your friends and family to be in the pictures. Think about way that the setting, backgrounds, action and emotion of the people in the pictures an help tell the story.
· Choose and research a social or political topic that interests you. Create two pieces utilizing both text and image. You may take your own pictures, find pictures or use a combination of both. The pieces should be visually different but fall under the same concept or issue.
· Create 2 digital collages that visually convey opposite ideas such as old and new, past and present, love and hate, etc. Develop your concept and begin looking for images on-line that could represent your ideas and create a visual paradox.
Before getting started on your project, you must complete a project proposal consisting of 3-5 sentences explaining your ideas and plans for the project. This can be written on a scrap sheet of paper and handed in to Ms. Boban.
There will be no Graphic Design final exam. Instead, this project will serve as the final.
Tuesday, May 17, 2011
The Eccentric Figure- Creating 3 Images
Now that you have taken a bunch of images of your figure, it is time to edit, manipulate and experiment in Photoshop. You may crop, zoom-in, adjust colors, increase contrast, create a background and see what happens when you apply filters. It is your time to play and become familiar with Photoshop again by making changes to 2 of your images.
- Each image should be a different view or should show a different part of your figure
- 1 image- no adjustments or cropping
- 2 images- play in Photoshop
- post all 3 images on your blog (no words or statement necessary)
Wednesday, April 13, 2011
The Eccentric Figure
The focus of this project is to create a unique and contemporary representation of the figure using photography. Utilizing Daniel Gordon’s photographic technique in which he creates sculptural collages of eccentric and abstracted figures, you will create your own figures utilizing found and taken photographs. Your constructed figure will then be photographed using lamps to create shadows and high contrast in the images.
Getting started:
1. Gather at least 30 pictures depicting people
· Collect as least 10 pictures of humans on the internet- get a range of faces and different body parts.
· Collect as least 10 pictures from magazines
· Take at least 10 pictures of people with your camera- you can photograph, yourself, friends, family, etc.
2. Print all of these images in color
3. Construct your figure using parts or pieces from at least 10 of the pictures (you can always use more). Although you are working with 2D images, build the figure to stand and have dimension.
4. Plan your background. Will you create the background by hand? Find images on –line? Or use your own photograph?
5. Photograph the figure using lamps to create high contrast and shadows in your images.
Photographs by Daniel Gordon


Photographs by Daniel Gordon


Wednesday, March 30, 2011
Photography Vocabulary
Candid Photography
focuses on spontaneity rather than technique, on the immersion of a camera within events rather than focusing on setting up a staged situation or on preparing a lengthy camera setup.
Arthur Fellig, WeeGee


Photojournalism
journalism that tells a story through pictures, instead of presenting news material through editing and writing . Photojournalists are thought to take pictures that are objective and neutrally charged with no specific underlying opinion.
Dorothea Lange
FSA Photographer


Documentary Photography
refers to a popular form of photography used to chronicle significant and historical events. It is typically covered in professional photojournalism, but it may also be an amateur, artistic, or academic pursuit. The photographer attempts to produce truthful, objective, and usually candid photography of a particular subject, most often pictures of people.
Stephen Shore


Street Photography
a type of docmentary photography that features subjects in candid situationswithin public places such as streets, parks, beaches, malls, polictical settings and other settings.
http://cityroom.blogs.nytimes.com/2011/03/23/triangle-fire-a-frontier-in-photojournalism/
Here is a short list of documentary photographers that you may research for your report.
focuses on spontaneity rather than technique, on the immersion of a camera within events rather than focusing on setting up a staged situation or on preparing a lengthy camera setup.
Arthur Fellig, WeeGee

Accident 42nd Street at Third Avenue, 1942

Lovers with 3D glasses at the Palace Theater, 1943

Summer, the Lower East Side, 1943
journalism that tells a story through pictures, instead of presenting news material through editing and writing . Photojournalists are thought to take pictures that are objective and neutrally charged with no specific underlying opinion.
Dorothea Lange
FSA Photographer

Migrant Mother, 1936

Documentary Photography
refers to a popular form of photography used to chronicle significant and historical events. It is typically covered in professional photojournalism, but it may also be an amateur, artistic, or academic pursuit. The photographer attempts to produce truthful, objective, and usually candid photography of a particular subject, most often pictures of people.
Stephen Shore

U.S. 2, Ironwood, Michigan, July 9, 19731973 - 2002

Ginger Shore, Causeway Inn, Tampa, Florida, Nov. 17, 19771977-2004

Wolf Street, Philadelphia, Pennsylvania 10/28/75
Street Photography
a type of docmentary photography that features subjects in candid situationswithin public places such as streets, parks, beaches, malls, polictical settings and other settings.
http://cityroom.blogs.nytimes.com/2011/03/23/triangle-fire-a-frontier-in-photojournalism/
Here is a short list of documentary photographers that you may research for your report.
Documentary Photographers
FSA (Farm Security Administration) 1930’s
Walker Evans
Dorothea Lange
Russell Lee
John Vachon
Marion Post Wolcott
Robert Frank
Gerry Winogrand
Lee Friedlander
Diane Arbus
Martha Rosler
Manuel Rivera-Ortiz
Joel Meyerowitz
Berenice Abbott
Jim Goldberg
Nan Goldin
Lauren Greenfield
Lewis Hine
Mary Ellen Mark
Steve McCurry
James Nachtwev
Gordon Parks
Eugene Richards
Jim Richardson
W. Eugene Smith
Peter Sekaer
Sally Mann
Daniel Lorenzetti
Tuesday, March 29, 2011


Monday, March 28, 2011
Time for You to Blog!
In an effort to see all the images you create in our digital photography unit, you will create a blog specifically for Graphic Design to show your artwork. A blog is a way for you to share your artwork with friends and other people. It's also a way for you to organize your work, see improvements and build a portfolio. You will keep and update your blog at different points in the semester when assignments are due and this will be the way that you turn in your assignments from now on.
Here are two blog sites I have used:
blogger.com - very basic, need to set up a gmail account to get started
tumblr.com- more design options, easy to use
Your assignment today is to finish editting your 7 images. Utilize Brightness/Contrast, Levels, and Curves to achieve a range of values. You may also experiment to achieve natural-looking colors using Color Balance. When you have made your changes to your images, save them as jpegs.
Then post your pictures on your blog with the title 7 Views of Jones as the title. You may give titles to your individual images if you want.
Photography Research Project
PHOTOGRAPHY RESEARCH PROJECT Graphic Design
Due
Choose two artists you would like to research and present to the class. The artists may be exclusively photographers or they can be artists who create different types of artwork including photography. At least one of the artists should be living and working now.
Part I Outline: In an outline format, please include the following information:
· Artist’s name
· where and when he/she was born and where the/she lives and works now
· university/art school he/she attended
· type of photography artist does (documentary, photojournalism, street, portraits, etc)
Part II: Write this information/ answer questions in complete sentences
· What ideas is the artist interested in? What is the work about?
· How does the artists’ style and picture-taking process connect to the concepts/ideas of the artwork?
· Why are you are interested, drawn to, and/or moved by the artist’s images?
Part II: Power Point Presentation- Choose 1 artist
· Create a simple power point displaying 4 photographs by the artist
· Images should be large and high-quality
· Develop 2 questions for the viewers to answer and/or think about for each artwork
· Describe the work- including concepts, subject matter, process, etc (basically tell us why these images are cool and what they are about so we can understand them better)
On-line Resources- galleries, museums and websites with good information & high quality images
You can do searches on these sites or look at artwork to find artists that interest you.
Art 21 (Art in the Twenty-first Century) PBS program & website
Saatchi Gallery (all contemporary artists- good images)
Gagosian Gallery
Museum of Contemporary Photography- Chicago
Museum of Contemporary Art (MOCA) - L.A.
Museum of Contemporary Art (MCA) - Chicago
New Museum – NY
PS1- Queens, NY
Museum of Modern Art (MOMA) - NY
Whitney Museum of American Art- NY
Lens Culture: Contemporary Art Magazine- lensculture.com
Photography-now.net
newyorkphotofestival.com
photography.nationalgeographic.com
New York Times- nytimes.com/pages/multimedia/index.html
Art Forum (magazine) - artforum.com
Art in America (magazine) – artinamericamagazine.com
Sunday, March 27, 2011
Editing Your 7 Photographs
Take a look at your photographs for aspects that may need to be changed or improved.
Contast- Does the image have a full range of values? This is also called full tonal range - highlights, mid tones, and dark values or shadows. An image is referred to as flat if it is lacking contast and punchy if it has too much contrast.
Brightness/Contrast
Levels- if image needs overall contrast
Curves- if image needs contrast within the midtones
Color- Does the color in the image look natural? Adjust the color using color balance. For example, if the image looks too blue, move the arrow on the scale towards yellow (its compliment) to make it the color more even and natural.
Color Balance


Wednesday, March 23, 2011
Digital Photography Procedures
Graphic Design I Digital Photography
1. Be professional and respectful when taking pictures. Do not disrupt other classes.
2. Wear a photography ID when taking pictures during class.
3. Do not take pictures inside other classrooms while class is in session. You may take pictures inside other classrooms before or after school with permission of the teacher or staff member.
4. Bring a flashdrive to class everyday.
5. If you do not have your own camera in class on a day when you are assigned to take pictures, you must use the camers in class. Just sitting around at your computer is NOT an option.
6. If you choose to use your own camera, you must have it in class (for in-class assignments).
Procedures for Using Cameras
In-Class
1. Get a camera from Ms. Boban and check for missing parts or damages. Immediately report anything to Ms. Boban
Each box contains: camera, USB cord, battery & av cable
3. Watch Ms. Boban write your name (and partner’s name) on blue tape and put it on camera box.
3. Make sure the number on camera matches the number on box.
4. Upload images onto your computer using USB cord.
4. When done using camera, return to Ms. Boban with all parts. Ms. Boban will remove your name if you are done using that camera for that particular project.
Outside of Class
1. See Ms. Boban in room 218 immediately after school to check out a camera overnight. Immediately report anything to Ms. Boban
Each box contains: camera, USB cord, battery & av cable
2. Fill out the equipment list with your name and date camera will be returned
3. The camera must be returned before school or at the beginning of class on the day it is due (this date will be determined by the specific assignment).
Sunday, March 20, 2011
15 Views of Jones
Many artists take make work about what they know. Take 15 pictures of Jones while utilizing the guidelines for taking better pictures. You will identify which guideline was used for each picture so really look at your view finder/LCD screen when taking pictures.
Below is a list of prompts that you can use for ideas or you can come up with your own. The purpose of this project is to look at a familiar environment in new or different ways and to make purposeful decisions when taking pictures and creating compositions.
Find shapes in the bathroom Cropping objects in a locker
Framing in the bathroom Reflections in bathroom mirrors or windows
Patterns in courtyard Portrait of a friend-step back & use rule of thirds
Visual cropping in classroom Pattern in the hallway
Friends talking or hanging out
Socializing at lunch
Pictures of hands and food at lunch
Feet in the hallway
Close up of trash or discarded materials
Portrait of someone without seeing his/her face
Draw viewer’s eye/movement in the link
Lay down on floor- view looking up
Personal items (backpacks, books etc)
Extreme close up in the court yard
Interaction of two or three people
Stand on a chair- take picture looking down on subject
Stairwells- different angles or perspective
Unexpected patterns & shapes on shelves
Picture outside looking in
Inside (from link or front doorway) looking out
Go to an area unfamiliar to you and take the picture from an odd angle
Take picture from the ground or lower than subject
Beginning Photography
Taking better pictures: composition
Published: June 20, 2005
Good composition is essential in photography. It allows you to convey messages and emotions through the images that you shoot. Fortunately, good photo composition is easy to achieve by following a few simple guidelines.
Rule of thirds
First, learn the "rule of thirds." As you look through your camera's viewfinder, imagine there are lines dividing the image into thirds, both horizontally and vertically, essentially dividing your image into nine equal-shaped blocks. Frame your subject at one of the intersection points instead of in the center of the viewfinder, as shown in the following illustration.
Now, with this said, many photographers make a very good living breaking this rule, but your photography will become much more interesting and visually stimulating if you use the rule of thirds when framing your subjects.
Framing
Careful framing of your subject can make a dramatic difference in your photos. Remember—every photo has a foreground and background, so use them together to add an interesting element to the shot.Use foreground elements to frame your photo's subject. Architectural elements work well (windows, doorways, arches, and so on), but you can find any number of interesting elements to use for framing your photos. The important point here is the subject. It doesn't do much good to frame your subject with interesting elements if they overshadow the subject, making it difficult to determine what the subject is supposed to be.

Visual cropping
Crop your photos visually before you take them. Look into the corners of the viewfinder. Do you see things that shouldn't be there? You can remove, or crop, these elements from your photos simply by moving closer to your subject, zooming in on your subject, or moving your subject within the viewfinder. Try different angles. Look for anything that will diminish the impact of unwanted objects in your photos.
Angle of the view
Believe it or not, the best angle for a photo is not always upright and directly in front of the subject. Some of the most interesting photographs are those taken from a unique vantage point. Get down to the level of the flowers before taking the picture. Climb a tree to take a picture of a meadow. Always ask yourself if the photo would look better taken as a landscape or portrait shot. Experiment and try different perspectives. Look for angles that are interesting and demonstrate the mood and inspiration you're trying to capture.
Balance
Achieving good balance in your photographs requires the correct combination of colors, shapes, and areas of light and dark that complement one another. Achieving the right balance in your photos is easier than it appears. Think about your subject and capture it from an angle, viewpoint, or even time of day that focuses attention on the subject.
Perspective
To capture the essence of what you experience when viewing a scene, it helps to add an element to your photo to convey this perspective. In the following picture, the bow of the boat helps to add an interesting perspective to the vastness of the scene. .
Without the bow of the boat in the picture, the scene would be far less interesting and void of any drama.

Draw the viewer's eyes through the photo
A path, a row of telephone poles, or even a line of chairs at the beach can serve as elements in a good photo.
These simple guidelines should help you find your "camera's eye." The key is to experiment and have fun, and the resulting photos will wow anyone who sees them.
Monday, February 7, 2011
Shepard Fairey

Tuesday, February 1, 2011
Changing an old photograph in Photoshop
We will be using our photographs to create large, graphic, high contrast paintings. First, the photographs should be changed in photoshop. The goal is make them look like a stencil with bold colors and shapes. Here is an example of mine below.

 There are a number ways to achieve this look and some of you may know a better way, but here is what I did. I encourage you to share ideas and techniques with one another.

- Open up your photograph in Photoshop. Duplicate the first layer.
- Then I increased the brightness and contrast a LITTLE! (Image-Adjustments-Brightness/Contrast). You may not have to do this, it depends on your image.
- Then I played with the color a little bit and made it more yellow-orangish. You may change the color however you like; it does not have to look like mine! (Image-Adjustments-Color Balance).
- You can also change the color by adding a colored photo filter. (Image-Adjustments-Photo Filter) Then click on the colored box and choose a color to make the photo have an overall layer of this color- it's subtle but a nice way to experiement with color.
- To achieve the stencil/cut-out look, you will use a filter and I think there are a few that will have this effect (solid sections of color, high contrast). The one I used is Cutout. (Fliter-Artistic-Cutout). At this point, a new screen will appear with small examples of the filters on the right side and Cutout will be highlighted. Your photograph will be on the left. If you cannot see the whole thing, click on the small arrow on the bottom left hand corner and highlight "Fit on screen".
- At this point, your photo should look semi-similar to mine. You can always go back and mess with the Adjustments if you need to.
- Print one in color and one in black and white. (Image-Adjustments-Desaturate).

Subscribe to:
Posts (Atom)