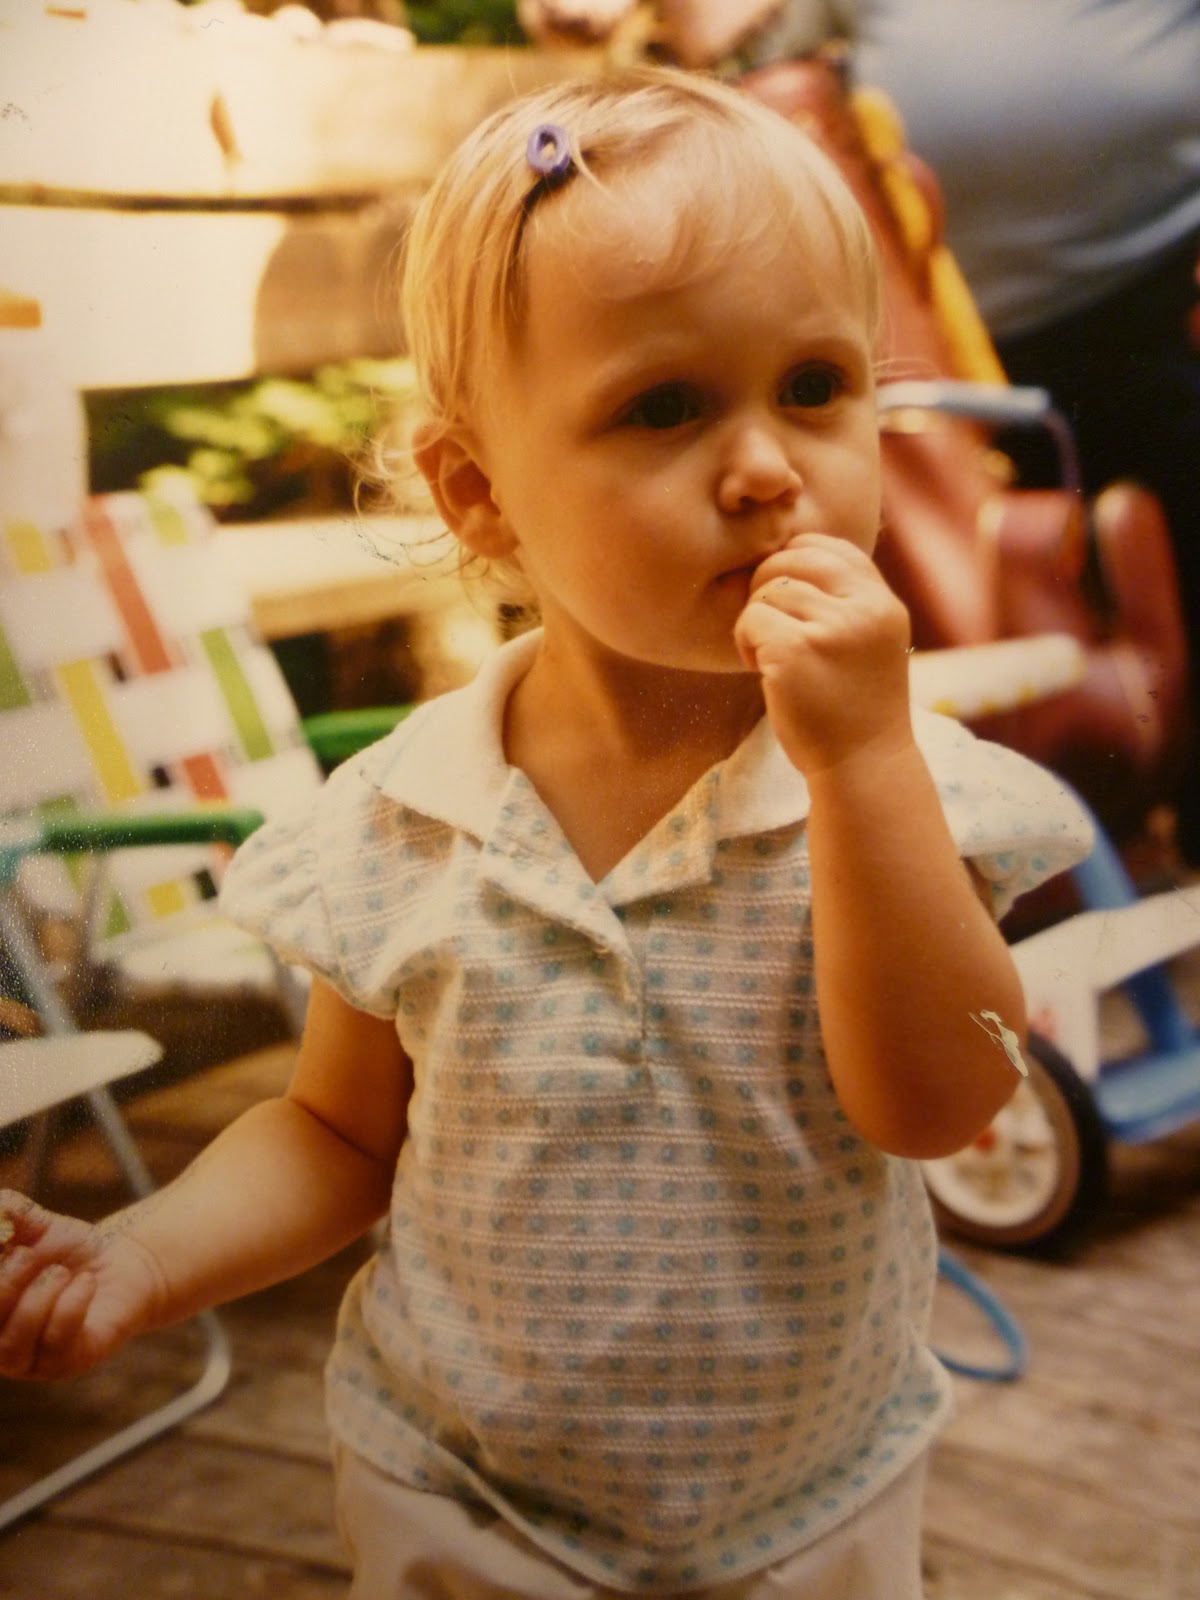
We will be using our photographs to create large, graphic, high contrast paintings. First, the photographs should be changed in photoshop. The goal is make them look like a stencil with bold colors and shapes. Here is an example of mine below.
There are a number ways to achieve this look and some of you may know a better way, but here is what I did. I encourage you to share ideas and techniques with one another.
- Open up your photograph in Photoshop. Duplicate the first layer.
- Then I increased the brightness and contrast a LITTLE! (Image-Adjustments-Brightness/Contrast). You may not have to do this, it depends on your image.
- Then I played with the color a little bit and made it more yellow-orangish. You may change the color however you like; it does not have to look like mine! (Image-Adjustments-Color Balance).
- You can also change the color by adding a colored photo filter. (Image-Adjustments-Photo Filter) Then click on the colored box and choose a color to make the photo have an overall layer of this color- it's subtle but a nice way to experiement with color.
- To achieve the stencil/cut-out look, you will use a filter and I think there are a few that will have this effect (solid sections of color, high contrast). The one I used is Cutout. (Fliter-Artistic-Cutout). At this point, a new screen will appear with small examples of the filters on the right side and Cutout will be highlighted. Your photograph will be on the left. If you cannot see the whole thing, click on the small arrow on the bottom left hand corner and highlight "Fit on screen".
- At this point, your photo should look semi-similar to mine. You can always go back and mess with the Adjustments if you need to.
- Print one in color and one in black and white. (Image-Adjustments-Desaturate).


No comments:
Post a Comment